Homemade Reese’s Cups with Sea Salt
Highlighted under: Sugar & Spice Kitchen
I absolutely love making my own Reese’s cups at home, especially with the touch of sea salt that elevates the flavor. It's such a simple recipe that brings the rich satisfaction of chocolate and peanut butter together in perfect harmony. After experimenting with several recipes, I found that the key to a great texture is to balance the peanut butter filling with just the right amount of powdered sugar. These homemade treats not only taste amazing but also make for a fantastic gift or snack!
While experimenting in the kitchen, I decided to recreate my favorite candy without any preservatives or artificial ingredients. The result was extraordinary! The key to achieving that creamy filling lies in ensuring the peanut butter is slightly warmed before mixing in the sugar. This way, you get a smooth consistency that melts in your mouth.
I also found that sprinkling just a pinch of sea salt right before the chocolates set adds depth to the sweetness, making each bite a delightful experience. It’s a little trick I love to share!
Why You Will Love This Recipe
- Rich chocolate flavor paired with crunchy sea salt
- Creamy peanut butter center that satisfies your sweet tooth
- Customizable to fit your flavor preferences or dietary needs
Perfecting the Chocolate Layer
Creating a smooth chocolate layer is crucial for the overall texture of your homemade Reese’s cups. When melting the chocolate chips with coconut oil, be sure to stir frequently and heat in short bursts to prevent scorching. You want the mixture to be glossy and fluid, which typically takes about 1 to 2 minutes of total microwave time. If you notice any lumps, a few additional seconds in the microwave should do the trick, ensuring a silky finish.
The choice of chocolate can significantly affect the final product’s flavor. While milk chocolate provides the classic sweetness, consider using dark chocolate for a more pronounced cocoa taste. If you prefer a healthier option, look for high-cocoa content chocolate. Just remember that the melting point may vary slightly, so keep an eye on it while heating.
Crafting the Peanut Butter Filling
The peanut butter filling is where the magic happens. Using creamy peanut butter is essential, as it lends a luscious texture to the cups. Natural peanut butter can also work, but you’ll need to balance it with an added liquid, like a splash of almond milk, to mimic that smooth consistency. When mixing in the powdered sugar, do so gradually to avoid clumping and ensure even sweetness throughout.
I recommend using a handheld mixer for this step to achieve a flawless blend. This not only saves time but ensures that no dry pockets of sugar remain. The mixture should be thick yet spreadable; if it seems too dry, consider adding a little more peanut butter or vanilla extract to keep it cohesive.
Final Touches and Storage Tips
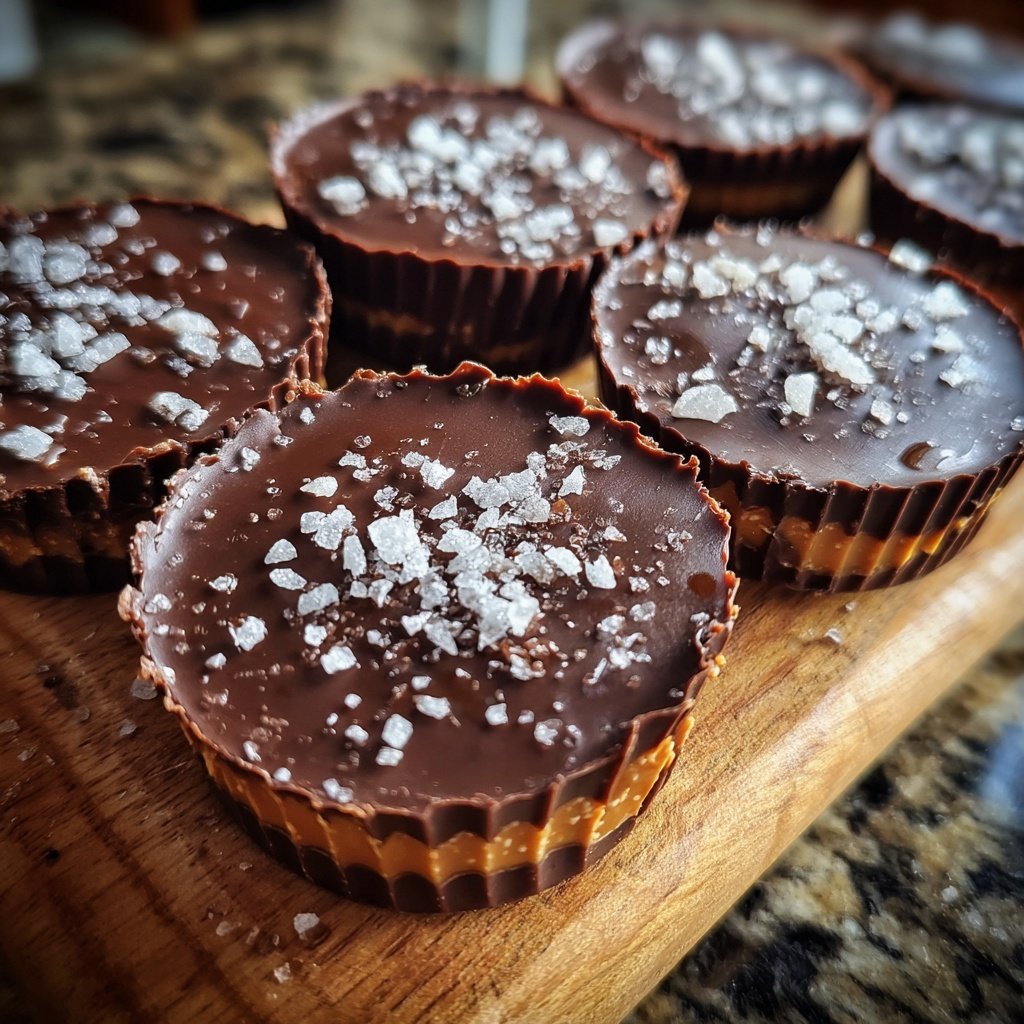
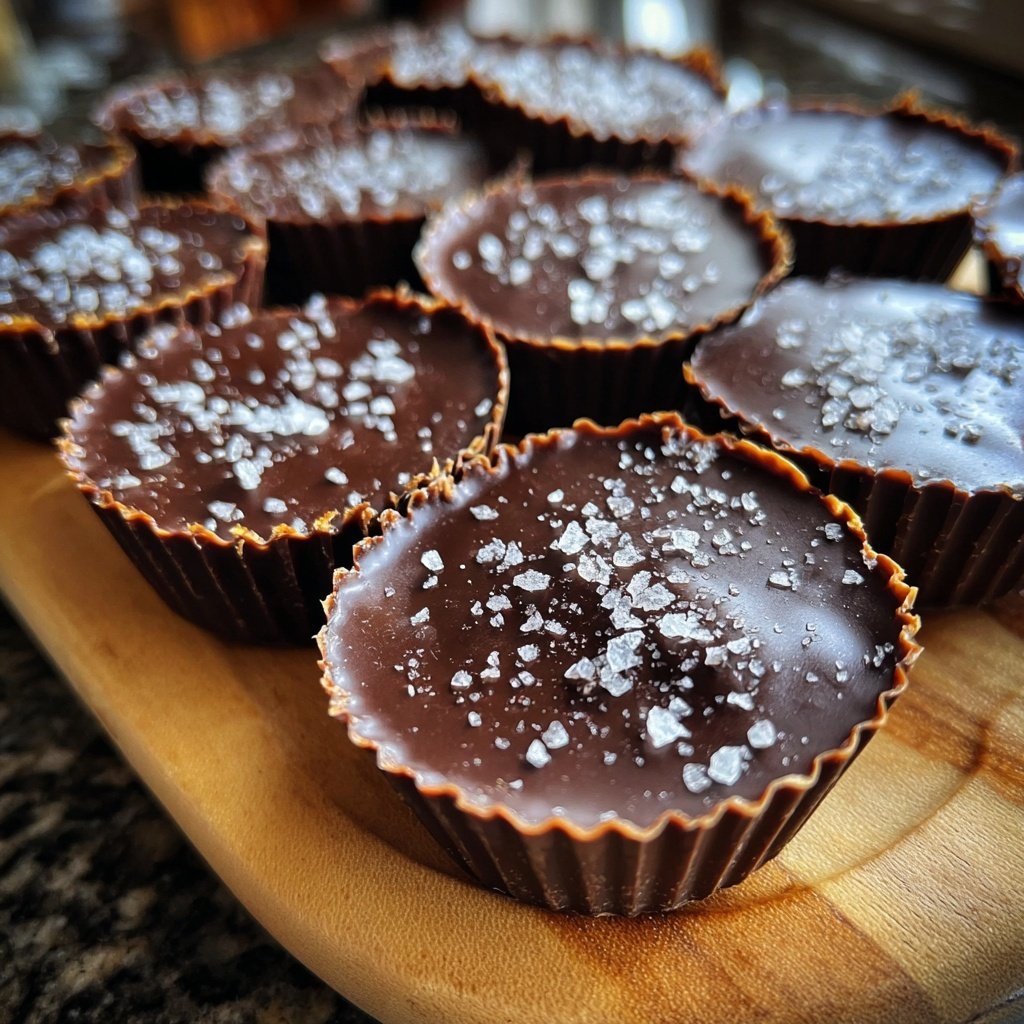
The finishing touch—a sprinkle of sea salt—may seem minor, but it beautifully enhances the flavor profile, balancing the sweetness of the chocolate and peanut butter. I recommend flaky sea salt for its texture and presentation, but any coarse salt will work. Apply it immediately after pouring the top layer of chocolate, as this will help it adhere better.
Once your Reese’s cups have set in the fridge, they can be stored in an airtight container. They maintain their best flavor for up to a week at room temperature or two weeks in the refrigerator. If you plan to make a larger batch, these treats can also be frozen. Just wrap each cup in parchment paper before layering them in a freezer-safe bag. Allow them to thaw in the fridge for a few hours before enjoying.
Ingredients
Chocolate Layer
- 1 cup milk chocolate chips
- 1 tablespoon coconut oil
Peanut Butter Filling
- 1 cup creamy peanut butter
- 1/2 cup powdered sugar
- 1/4 teaspoon vanilla extract
- Pinch of salt
Finishing Touch
- Extra sea salt for topping
Instructions
Prepare the Chocolate
In a microwave-safe bowl, combine the chocolate chips and coconut oil. Heat in the microwave in 30-second intervals, stirring in between until smooth and melted.
Mold the Chocolate
Spoon a layer of the melted chocolate into the bottom of cupcake liners, filling them about a quarter full. Use the back of a spoon to smooth it out evenly. Place them in the refrigerator to set for about 10 minutes.
Make the Filling
In a mixing bowl, combine the peanut butter, powdered sugar, vanilla extract, and a pinch of salt. Mix until smooth and well combined.
Add the Filling
Once the chocolate has set, remove the liners from the refrigerator. Spoon a dollop of the peanut butter mixture into each cup, spreading it evenly to cover the chocolate layer.
Finish with Chocolate
Pour the remaining melted chocolate over the peanut butter filling, ensuring it's fully covered. Sprinkle a pinch of sea salt on top and return to the refrigerator to set for at least 15 minutes.
Once the cups are set, carefully peel away the liners. Enjoy your homemade Reese's Cups or store them in an airtight container in the fridge!
Pro Tips
- If you prefer dark chocolate, feel free to substitute the milk chocolate chips for dark chocolate ones for a richer flavor.
Variations to Explore
Feel free to experiment with different nut butters in your filling! Almond butter or cashew butter can offer delightful twists on the classic flavor. Each nut butter has its unique taste profile and texture, so don’t hesitate to try what you enjoy most. Just be sure to adjust the sweetness level accordingly based on the nut butter's natural flavor.
You can also add fun mix-ins to the peanut butter filling, such as crushed pretzels, mini chocolate chips, or dried fruit. These additions can provide an interesting texture and a touch of extra flavor without compromising the integrity of the Reese’s cup.
Common Troubleshooting Tips
If your chocolate layer doesn't set properly, it likely needs more time in the fridge. Ensure you're using the right amount of coconut oil, as too little can prevent the chocolate from hardening correctly. On the other hand, be cautious not to overheat the chocolate when melting, as burned chocolate can seize and become grainy.
Another common issue might be a runny peanut butter filling. If you find that your mixture is too loose, consider adding a bit more powdered sugar or chilling it before layering. This will help firm it up and make it easier to spoon into the chocolate cups without spilling.
Questions About Recipes
→ Can I use natural peanut butter?
Yes! Just make sure it's well-stirred and remove excess oil if necessary to maintain the right consistency.
→ How long can I store these?
You can store them in an airtight container in the fridge for up to two weeks.
→ Can I make these vegan?
Absolutely! Use dairy-free chocolate and a vegan alternative to powdered sugar for a fully vegan treat.
→ What can I do if my chocolate doesn't set?
Make sure to not overheat the chocolate, and also check that the peanut butter filling is at room temperature before assembly.
Homemade Reese’s Cups with Sea Salt
Created by: Felicity Grant
Recipe Type: Sugar & Spice Kitchen
Skill Level: Intermediate
Final Quantity: 12 cups
What You'll Need
Chocolate Layer
- 1 cup milk chocolate chips
- 1 tablespoon coconut oil
Peanut Butter Filling
- 1 cup creamy peanut butter
- 1/2 cup powdered sugar
- 1/4 teaspoon vanilla extract
- Pinch of salt
Finishing Touch
- Extra sea salt for topping
How-To Steps
In a microwave-safe bowl, combine the chocolate chips and coconut oil. Heat in the microwave in 30-second intervals, stirring in between until smooth and melted.
Spoon a layer of the melted chocolate into the bottom of cupcake liners, filling them about a quarter full. Use the back of a spoon to smooth it out evenly. Place them in the refrigerator to set for about 10 minutes.
In a mixing bowl, combine the peanut butter, powdered sugar, vanilla extract, and a pinch of salt. Mix until smooth and well combined.
Once the chocolate has set, remove the liners from the refrigerator. Spoon a dollop of the peanut butter mixture into each cup, spreading it evenly to cover the chocolate layer.
Pour the remaining melted chocolate over the peanut butter filling, ensuring it's fully covered. Sprinkle a pinch of sea salt on top and return to the refrigerator to set for at least 15 minutes.
Extra Tips
- If you prefer dark chocolate, feel free to substitute the milk chocolate chips for dark chocolate ones for a richer flavor.
Nutritional Breakdown (Per Serving)
- Calories: 150 kcal
- Total Fat: 9g
- Saturated Fat: 4g
- Cholesterol: 0mg
- Sodium: 95mg
- Total Carbohydrates: 14g
- Dietary Fiber: 1g
- Sugars: 8g
- Protein: 3g